Restore Data using Backup
Your hosted data is being continuously stored in regular intervals. In case that anything goes arye and you suspect missing important data, you may access the backup option inside of your my.green.ch Web & Mail Control Panel.
Here you can choose to restore your web files, databases and email messages. After reading this article, you will know how this is done inside of your Web & Mail Control Panel.
Procedure
Log in to your my.green.ch Customer Portal using your MY user and password and navigate to the startpage of the Web & Mail Control Panel.
Selecting the Backup
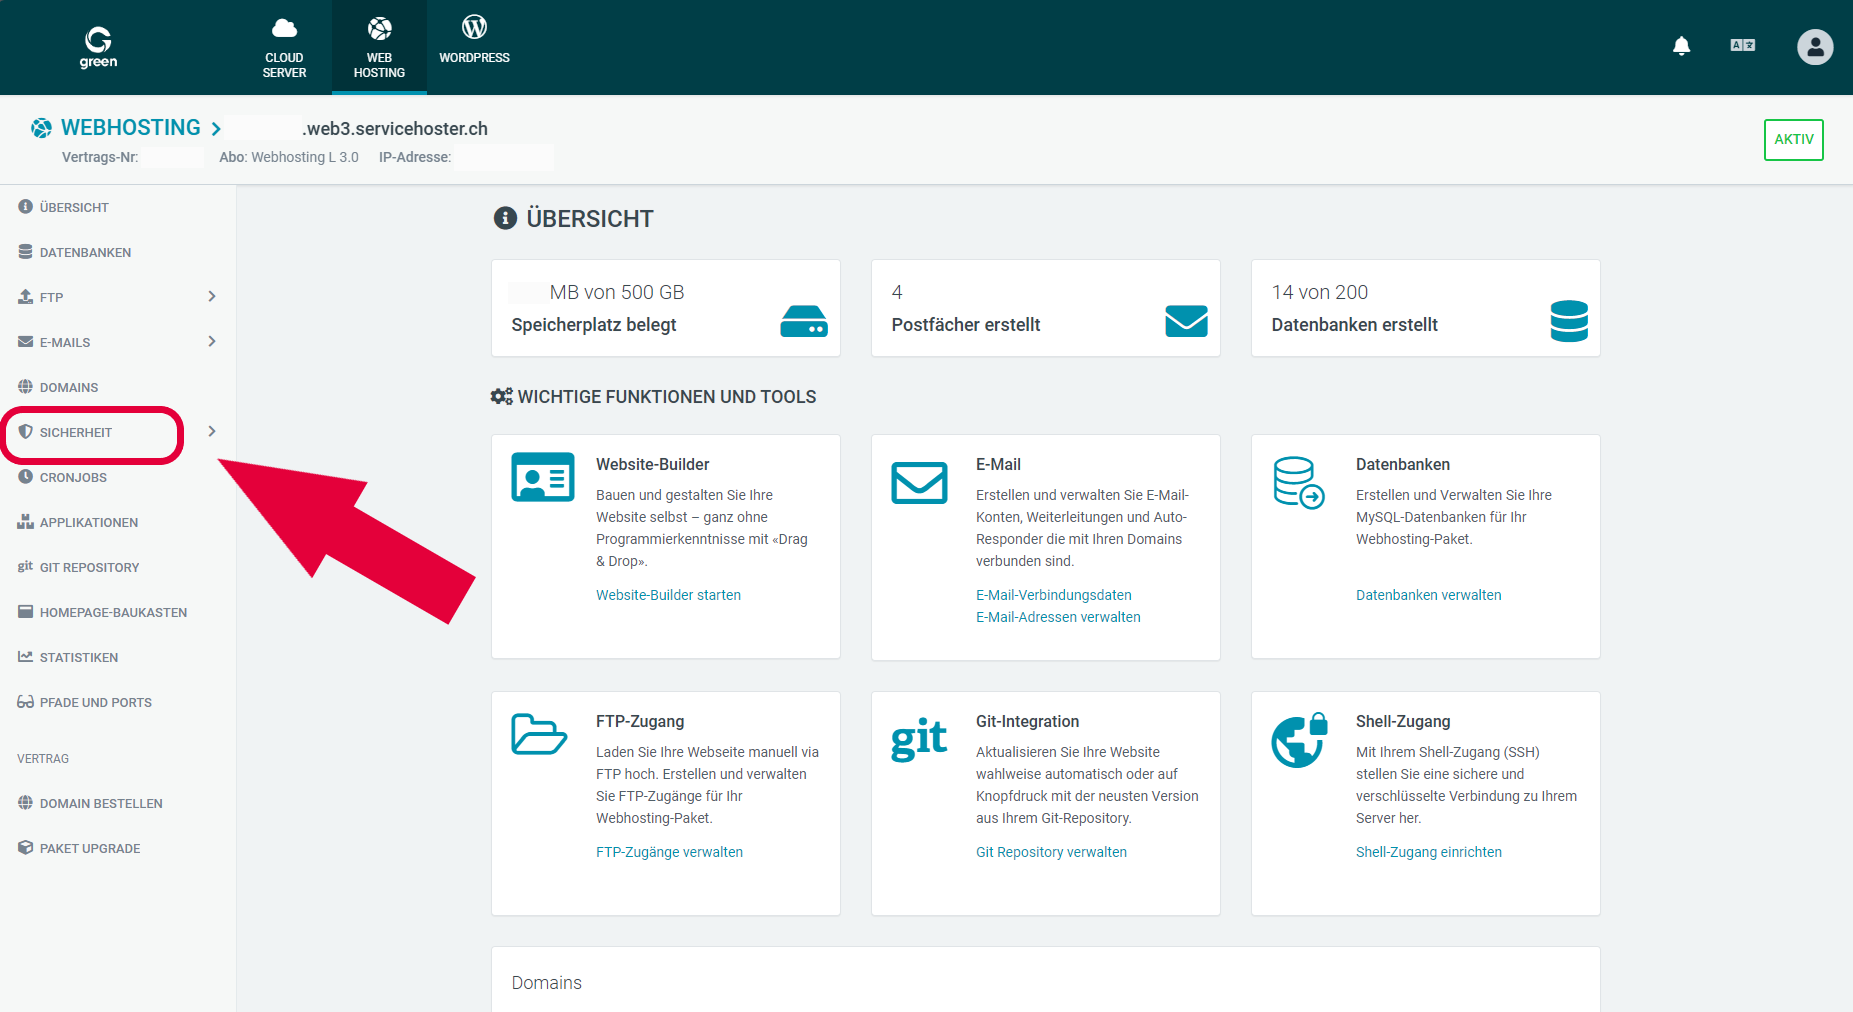
Select the option titled Security inside the navigation pane on your left-hand side.
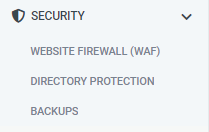
Here you will find three different options:
- Website Firewall (WAF)
- Directory Protection
- Backups
Select the third option called Backups.
You may now select the specific date and time stamp that you would like to use for your data recovery.
Note: The oldest retrievable backup version is from 14 days prior to the current date.
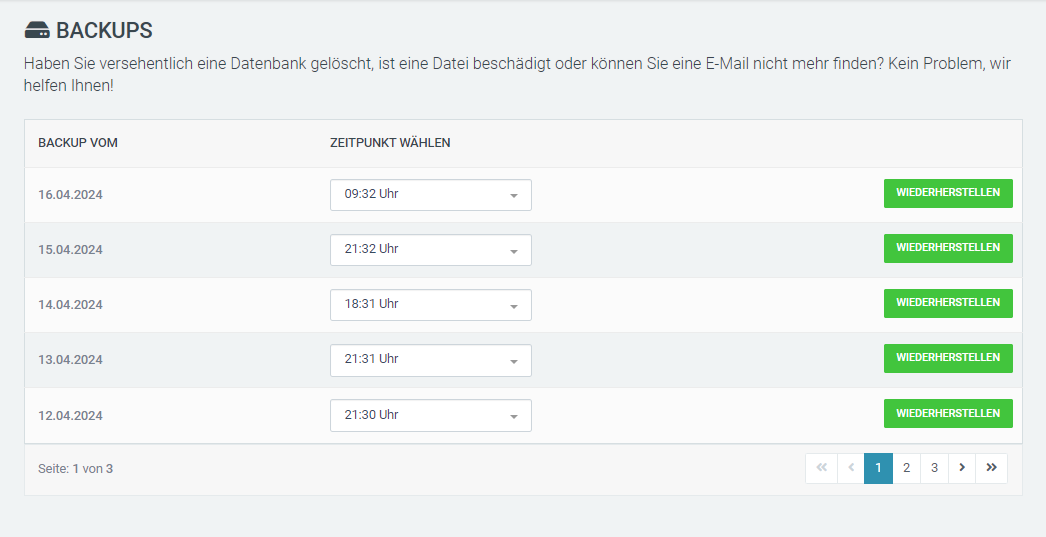

Once you have decided on your desired time stamp and date, click the button titled RESTORE.
Selecting Recovery Option
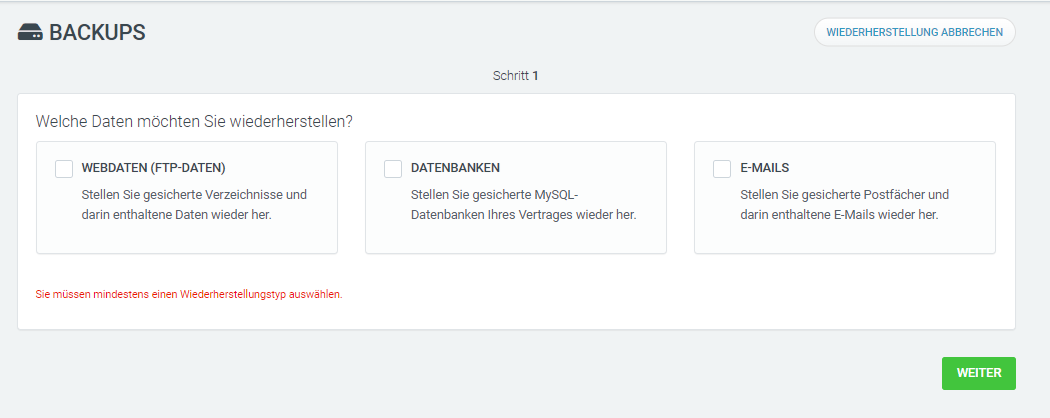
Select which type of data you would like to recover. You may choose from three different options:
- Web Data (FTP Data)
- Databases
- Emails
Note: Should you at any point like to cancel the recovery, select the option ABORT RECOVERY on your top right-hand side.
Web Data (FTP Data)
This type of data is used mainly for displaying your website, but may also include other types of data. It may be accessed using FTP (File Transfer Protocol).
Databases
Select this option if you would like to restore a database. Please check beforehand, which databases are being used for which applications inside of your Web & Mail Control Panel under the section Databases.
Web applications and Content Management Systems (CMS) such as WordPress typically use a database such as a MySQL database.
Emails
Use this option if you would like to restore your email messages.
Note: Only select the option(s) as to which you are certain that are missing data.
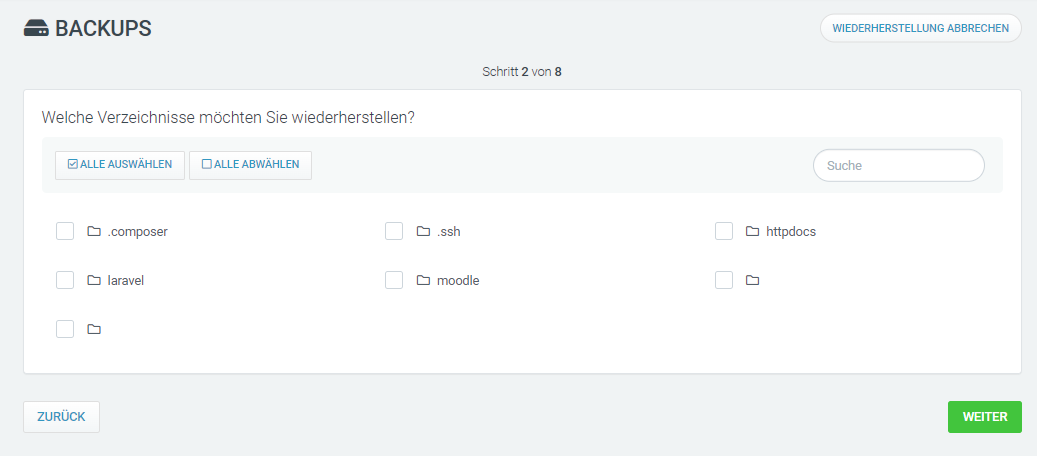
Web Data (FTP Data)
Specify which directories you would like to restore. If you would like to restore all of them, then click on the button SELECT ALL.
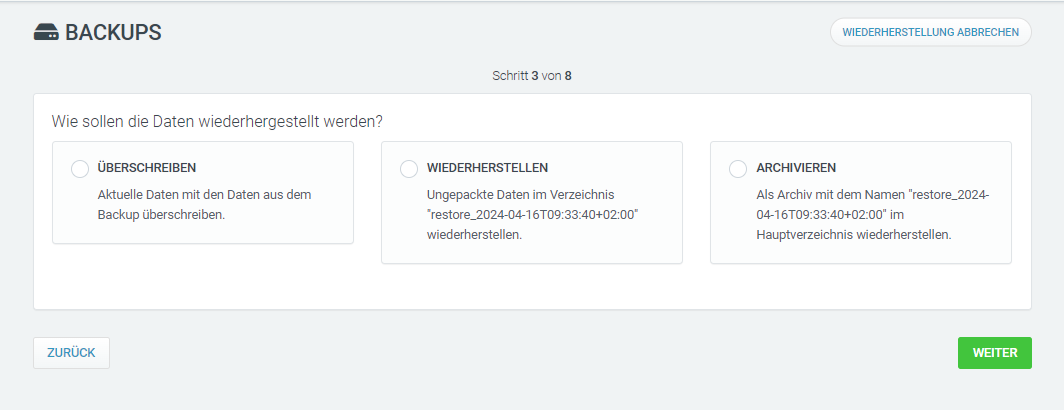
Next, specify how exactly you would like to restore your data.
Overwrite
Current data gets overwritten by the data stored in the backup.
Restore
A separate directory will be created for the restore files.
Archive
An archive directory will be created inside of the root folder.
Note: If you are missing any data or your data integrity has been comprimised, we recommend using the option to overwrite.
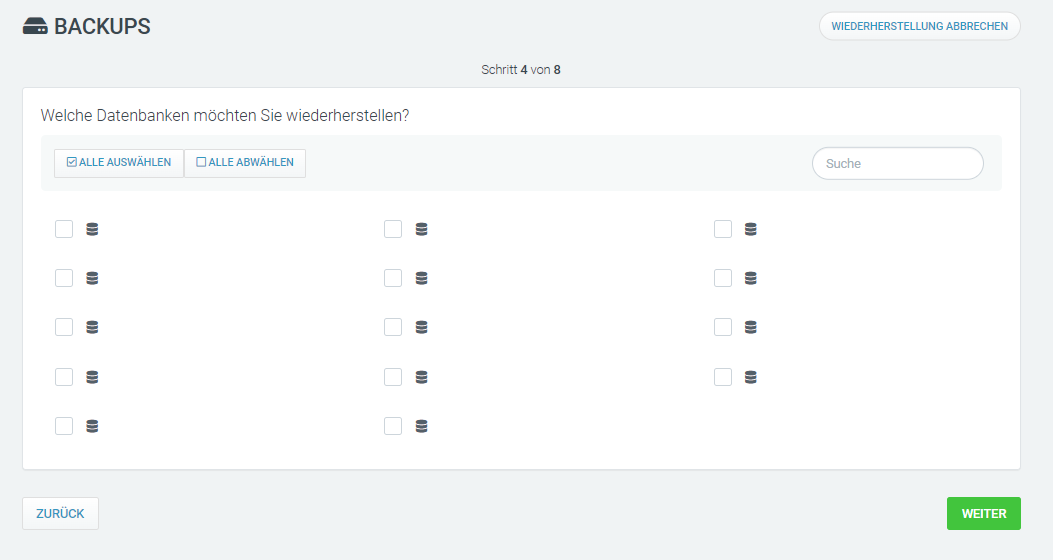
Databases
Select which database(s) you would like to restore. If you would like to restore all of them, then click on the button SELECT ALL.
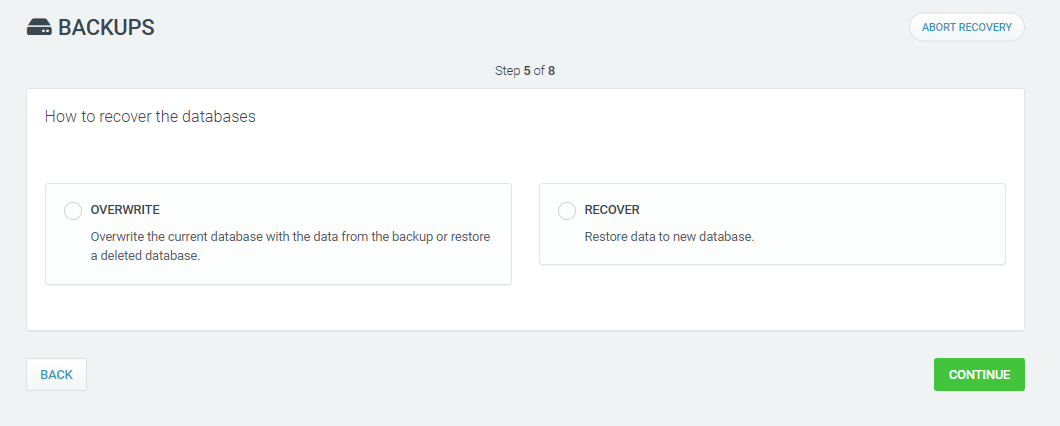
Pick an option between Overwrite and Recover.
Overwrite
The current database gets replaced and the data gets overwritten by the database version from the selected backup. If there no current database exists (ie. it has been deleted) then it will automatically be re-created with the version from the backup.
Confirm your choice by activating the checkbox titled I understand that existing database will be overwritten by the recovery and consent to this.
Recover
A new and separate database will be created. If you choose this option, define the name for the database about to be created.
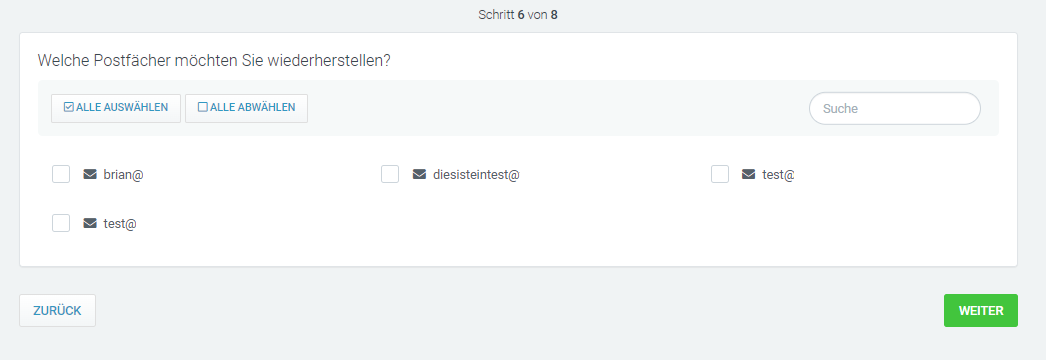
Emails
Specify which email addresses you would like to recover.
Overwrite
All pre-existing emails will be overwritten with the ones from the backup file.
Supplement
All pre-existing emails are being kept and supplemented with any missing emails.
Recover
All emails from the backup file will be placed inside of a new mailbox.
Initiate Backup Procedure
All relevant details are being summarily listed. Make sure to check that everthing is correct before proceding. Once you are satisfied, click on START RECOVERY to proceed.
Note: Once the restore process has been started, it can no longer be cancelled. The process may take several hours depending on the data volume.
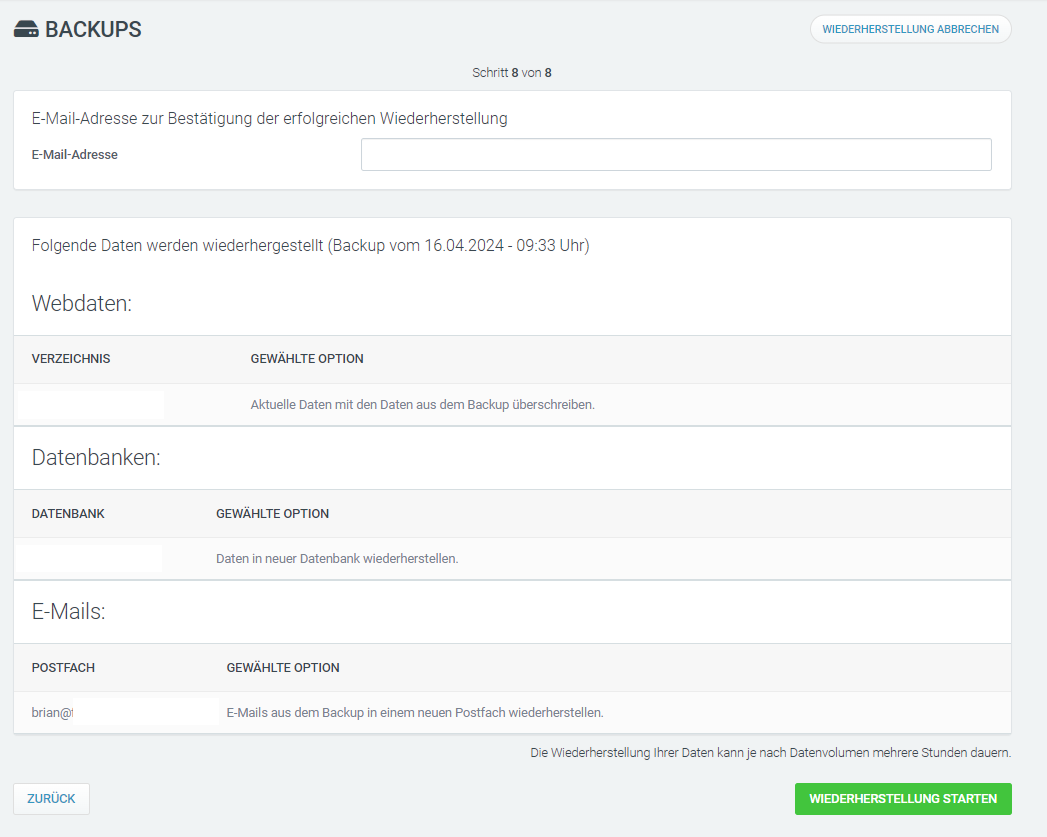
Once the restore process has been completed, you will receive an email notification.
